Showing posts with label Home. Show all posts
Showing posts with label Home. Show all posts
Creating our Paperless Home
It has been a whirlwind of sorting, scanning and shredding paper over here! I knew this process would take a while, but I never expected to have it take this long. Between figuring out if we need to keep paperwork, scanning it and figuring out our tags, and actually having time to do the work, it has been an adventure. But an adventure that is sooo worth it!

The first step we did was to sort the papers. This step is also outlined in The Paperless Home. We sorted all of our papers into 3 piles: Trash, Scan & Shred, and Scan & Keep.
The trash pile was easy - straight to the shredder!
Then, I started scanning the pile I knew that I could get rid of, the Scan & Shred. We knew that everything in here wasn't 'essential' to the home. This pile took a while to scan, but once I finished, I knew I only had one pile left.
This pile is one that I am still working on. The reason this pile is taking so long is because it turned from 'Scan & Keep' pile into a 'Scan & do we really need to keep this?' pile. So I am slowly working my way through this stack of papers and having a conversation with my husband about if we really need to keep these papers. (You will be happy to know that most of the answers are 'no'.)

A huge step in this whole Paperless Home is learning Evernote. Without the videos provided by The Paperless Home, I could have figured it out eventually, but it made the whole thing go faster. I especially loved that Donnie walked you through the 2-step verification process. I set up my Filing Cabinet and Notebook Stacks a bit differently than he did, but he gave me a great foundation! I also emulated the way he named each of the notes that we imported, it makes it so much easier to find everything.
I am really enjoying using Evernote so far. We did start with the basic plan to try it out and upgraded for a month to see if it was worth it (we had a credit in our paypal account to cover this) and we decided it was worth it. Being able to access our files and search easier in Evernote is so convenient and worth the small monthly payment.
Along the way I have learned a couple of new things. I also was able to use what we had to make this Paperless Home work well for us.
You can find out more about the Paperless Home here.
If you know you would like to get started, you can purchase the ebook or packages with videos here.
Buy Now
Sorting Papers
The first step we did was to sort the papers. This step is also outlined in The Paperless Home. We sorted all of our papers into 3 piles: Trash, Scan & Shred, and Scan & Keep.
The trash pile was easy - straight to the shredder!
Then, I started scanning the pile I knew that I could get rid of, the Scan & Shred. We knew that everything in here wasn't 'essential' to the home. This pile took a while to scan, but once I finished, I knew I only had one pile left.
This pile is one that I am still working on. The reason this pile is taking so long is because it turned from 'Scan & Keep' pile into a 'Scan & do we really need to keep this?' pile. So I am slowly working my way through this stack of papers and having a conversation with my husband about if we really need to keep these papers. (You will be happy to know that most of the answers are 'no'.)
Learning Evernote
A huge step in this whole Paperless Home is learning Evernote. Without the videos provided by The Paperless Home, I could have figured it out eventually, but it made the whole thing go faster. I especially loved that Donnie walked you through the 2-step verification process. I set up my Filing Cabinet and Notebook Stacks a bit differently than he did, but he gave me a great foundation! I also emulated the way he named each of the notes that we imported, it makes it so much easier to find everything.
I am really enjoying using Evernote so far. We did start with the basic plan to try it out and upgraded for a month to see if it was worth it (we had a credit in our paypal account to cover this) and we decided it was worth it. Being able to access our files and search easier in Evernote is so convenient and worth the small monthly payment.
Tips and Tricks
Along the way I have learned a couple of new things. I also was able to use what we had to make this Paperless Home work well for us.
- Use the scanner you have and make it work for you. The ScanSnap that is recommended in the book, along with several websites I saw, and looks so easy to use. But, I didn't have an extra $300 to just throw at a new scanner, and I don't know many who do. I have a Brother All-in-One that we got at a super discount on Black Friday about 4 years ago. We love it and it has yet to fail us. Some Brother printers, I found out, do have the capability to connect to Evernote, mine however is an older version and does not have that capability. However, I created a folder named 'For Evernote' on my computer that my scanner now sends the scanned documents to. This way it is easy to just click and drag the files from that folder into the Evernote Inbox. Then as I go through each one, I rename it, add tags and file. Simple as that. It's just one more step.
- When in doubt, skip it and come back. One of the things that was holding me up in the beginning was looking at a piece of paper and trying to decide if it was worth keeping. So what I decided to do was just assume I would keep it after scanning. This way, I was able to just get started and learn. After getting started and having the chance to reread the book, I can now determine quickly if I even need to scan some of the items. This process is going a lot faster than it would if I took the time to figure these things out in the beginning.
- Do bulk scanning. At first, I would scan and then go enter the document into Evernote. I thought this was a great idea and I thought I was really making some progress. But I saw that my piles were not going down as quickly as I wanted. I also only had the morning before my daughter woke up to really have access to the scanner. So I decided to bulk scan. I just spent the half hour that I had in the morning scanning to my computer. Then, at naptime or in the evening, when I could access my computer but not the printer, I organized everything into Evernote - which went so quickly.
You can find out more about the Paperless Home here.
If you know you would like to get started, you can purchase the ebook or packages with videos here.
Buy Now
Owner's Manual & Warranty Organization
Murphy's Law: When you finally get to heat up your lunch for the third time this afternoon and your child is actually napping, your toaster oven calls it quits with cold pizza still inside. You know it's not dead and you want to troubleshoot it, but where is that owner's manual - and warranty in case it's broken.
Yes. I have lived this situation. Owner's Manuals. This is one area that Marie Kondo, the creator of the KonMari Method, and I disagree on. And this is probably the only time I will tell you that I think it is ok to keep papers around.

Conquering Paper Clutter with the Paperless Home
I am a piler. I pile papers into different groups but never get rid of anything. I think I have a system until I can't find the life insurance paperwork to make my payment. Days later I find it, and it's late, in danger of being terminated. I think it's time to tame the paper clutter.

Master Bedroom Reveal - Small Changes Make a Huge Impact
Well, August has come and go and I am finally ready to reveal to you our master bedroom!

It was truly a team effort from my husband and I. I am so happy to be able to have his help. He has really come on board to help out more since his work schedule has loosened up a bit. It really helps in the completion of projects!
It was truly a team effort from my husband and I. I am so happy to be able to have his help. He has really come on board to help out more since his work schedule has loosened up a bit. It really helps in the completion of projects!
DIY Tufted Fabric Headboard: the Do's and Don'ts
In the process of making our master bedroom a real retreat, we decided we wanted a headboard. We looked for options to buy, but we had already spent a fair share in the bedroom and we wanted to be able to DIY one since it would be much more affordable then buying one.

There are TONS of tutorials out there for making a DIY Fabric Headboard, this is not one of them. I am going to walk you through some of the dos and don'ts for creating your own headboard. Since none of the tutorials seemed to run into any problems that we did, I wanted to share our experience and what we did to solve the problems we encountered. So learn from my mistakes and keep this handy when you decide to do your own.
There are TONS of tutorials out there for making a DIY Fabric Headboard, this is not one of them. I am going to walk you through some of the dos and don'ts for creating your own headboard. Since none of the tutorials seemed to run into any problems that we did, I wanted to share our experience and what we did to solve the problems we encountered. So learn from my mistakes and keep this handy when you decide to do your own.
Using KonMari Folding to Organize Your Drawers
We have been super busy here finishing up our bedroom makeover for this month. We have been so busy in the bedroom working, I have been slow on posting here about our updates. So we may be posting some tutorials in September - oops :).

Now that we have been able to bring our wardrobe under control
(hubby worked on his this past weekend) we have been able to find the best way to organize our dresser drawers and our now minimally used closet space.Finding the Joy in Your Clothing with the KonMari Method
I have mentioned that I read and started to implement "The Life-Changing Magic of Tidying Up", lovingly referred to as the KonMari Method. I talked about this a bit when we did the Master Bathroom Organization but I skipped ahead in talking about the process - on purpose.

The first step in the process is actually to start with clothing. Her thought is that it is easier to decide if a piece of clothing brings you joy rather than a photo you may be holding on to. So, even though I shared our decluttering from the bathroom first, I actually did go in order and started with my clothes.

The first step in the process is actually to start with clothing. Her thought is that it is easier to decide if a piece of clothing brings you joy rather than a photo you may be holding on to. So, even though I shared our decluttering from the bathroom first, I actually did go in order and started with my clothes.
5 Splurge Worthy Office Supplies to Buy During Back to School
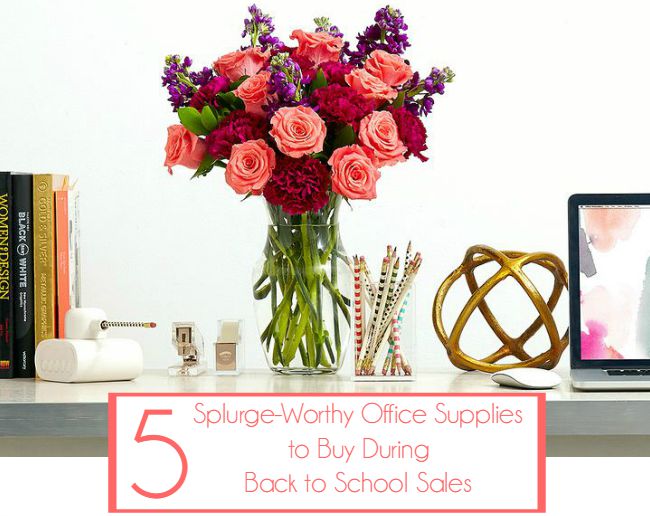
Today I am guest posting for my friend Brittany over at Overdue Organizing.
"I love office supplies. I actually have such a problem with hoarding office supplies my husband has put a ban on new supplies coming in the door. Not to mention I used to shop these sales for my classroom before I became a stay-at-home mom. Since I am a self-appointed expert on what to purchase during this time of the year, I wanted to share with you the prefect items to make your desk, and you, smile."
Be sure to head over to her blog and see what items are worth shopping for during the current sales.
Using the KonMari Method to Tidy My Home

*This post contains affiliate links. You get to shop from your couch and support Managing a Home. win-win :)*
I have been encouraged by several bloggers to read the Life Changing Magic of Tidying by Marie Kondo. The system has been nicknamed the KonMari Method as a combination of her first and last name. I have to say, I was a bit skeptical reading the title, but I bought the Kindle version and I started to read.
Little Girl Nursery Gallery Wall
Several weeks ago, I asked my husband to put up the frames that I bought in our daughter's room. I took the time and planned out the placement and orientation of each frame and he hung them for me. Several weeks later, here I am just getting the frames filled.


It was very hard to narrow down which prints I would use for the frames. I had a Pinterest board filled with ideas and needed to make some decisions.
You will see below where I got the prints from or if I made them myself. I printed all of the prints at Staples. They do a great job of accommodating sizing for your prints.
{from left to right}: Cute as a Button - {original} {my 5x7 print} | beYOUtiful | State Printables {all 50 states are included} | Twinkle Twinkle {printed and put on scrapbook paper} | Glitter Heart 'S' - cut on silhouette from glitter vinyl{inspiration not available anymore - tutorial to come} | You are Loved | ABC Printable {missing from the gallery - printable verse}
Visit these great places and print out some new ideas, whether you are sprucing up your current gallery wall or you are creating a new one.
Happy decorating!
Homemade Laundry Detergent without Borax
I am so excited to share with you today the best homemade laundry detergent that I have ever made! I have tried and failed several times to make my own laundry detergent but I could never get it right. It was either too lumpy, too much measuring or just didn't work. I have so many different kinds of powders to combine, I need to purge now. I have found the perfect recipe!

A while back I stumbled upon an amazing blog called Bren Did. She has several natural cleaning solutions and I loved her recipe for Homemade Laundry Detergent. I decided that when I was done with the detergent I was using (which was Mrs. Jones Soapbox and does work wonderfully..but does have borax in it) I was going to try and make Bren's version.
So I finished up our detergent and ordered my materials. Because I do not want to copy the recipe on this site, I am only going to list the materials I got and where I got them for your reference.
*Assume all links are affiliate links. Learn more here. Thanks for your support!*
Amazon
Kirk's Castile Soap - $2.18/bar
Washing Soda - $8.99/box
OxiClean Baby - $13.95/tub
Target
Epsom Salt - $3.18/4 lb {this is optional in the original recipe, but I added it in. Between smelly gym clothes and baby stains, I need all the extra help I can get}
Baking Soda - $1.24/2 lb
Total Cost
My total cost was $35.73. About $15 more than Bren's. Next time, I will go out and purchase all of my products from stores when I am on my last container so I will not be rushed.
I also made a TON of this! It will def be more than 320 loads. I am keeping a tally of how many loads I get using 1-2 Tablespoons per load and I will update back :)
My Assessment
Ease of creation - This was super simple after you get over the 'grating the soap' part. I just sat down in front of a good Netflix show with my soap and grater and grated away. After you process the soap into smaller bits {I use an old processor for that} it's just a matter of dumping and mixing the rest of the ingredients. I like how I didn't have to measure, I just poured. I used a large container that used to be used for laundry detergent to mix. Then I just put it in storage containers. Super Simple
Smells be gone? My husband stinks. Let me clarify..when he goes running, his clothes smell so bad that you can smell them from outside the laundry room, with the door closed. My old homemade laundry detergent did NOTHING for this smell. I actually had to add in TSP in order to take the smell away. With this one - it work wonderfully! I did add the vinegar into the fabric softener space to help and I am glad I did! It's just an extra helper for the laundry detergent.
I am so happy that I found this recipe! Bren provides a free printable recipe card to keep on hand. I printed it out and laminated it so I can start a 'natural cleaning recipe ring'. Thanks Bren for posting a great detergent!
Happy Cleaning!
Organize your Email Subscriptions
Just dropping in to tell you that I am guest posting at Organizing Moms this weekend with a great quick article about how to organize your email subscriptions and coupons.

Be sure to drop in and check it out. Say 'Hi' to Katie for me too!
Enjoy the rest of your weekend!
Be sure to drop in and check it out. Say 'Hi' to Katie for me too!
Enjoy the rest of your weekend!
Deep Cleaning the Baby's Nursery
In our home, we do spring cleaning a little differently. I don't stress myself out to try and deep clean our entire home in one to two months. I have never done this, but with a toddler running around, it is even more difficult to imagine trying to get that all done! It may work for some people, but not for us. In our home, we manage our spring cleaning by designating a room or group of rooms to be deep cleaned every month.

My daughter's room is the room that is to be deep cleaned this month. It is also the focus for my project organization this month. Coincidence, maybe...
Happiness is a {green} clean stove
I don't know about you, but there is nothing better than a clean kitchen. I think of the kitchen as the heart of the home. This is where you spend time cooking food for your family, sit down and talk over food and wine, and it is just so warm and cozy. So when my kitchen was a distater area for the last couple of months, I decided not to wait for April {with Operation Project Organize} I needed to fix it NOW!

Mail Management in a Small Home & Organizing Blog Hop
Is it just me or does mail seem to multiply. I have tried to minimize my mail by removing us from mailing lists and getting digital magazines and subscriptions, but somehow, it all starts to creep back in. Instead of our piling system on the table, I needed a way to get the mail to the correct person and preferably not just piled somewhere else!

How to use Google Calendar to Organize Your Family
We are a Google loving family. We have Google emails, we use Google Drive to share and store photos and documents, I use Google Keep to keep track of my blog ideas and Christmas present ideas and we use Google calendar to help keep our schedule's straight.

Corralling Receipts at the Front Door
Everyday, we accumulate more and more paper it seems. Today, I am sharing with you how I have started to corral my receipts so that I can update them in our budgeting system.

We use Mint.com to manage our budget for free. We love the program and I have been using the website before my husband and I were married..so at least 5 years. We are even able to split a purchase into two, or more, categories in the budgeting system. This is a great feature, if you actually know what you bought and where it is to be allocated.
I hated the piles of receipts piled on my desk and it was bound to happen that I would be missing an important one and just have to make it up. I really needed an easy way for my husband and I to keep the receipts together until I was able to input them.
Currently, at our front door, we have a shelf that also has hooks to hold our jackets. We always take off our jackets and shoes there, the kitchen is there and my husband uses this area as a dumping ground. If I was going to have a chance to get those receipts, this was it. I simply put a chalkboard container I had laying around for years up on the shelf and labeled it. I instructed my husband to put all receipts in the bin. No lifting a lid, no sliding a drawer, just place it in.

Even before Month 2's Challenge, I put this into action {early January, I couldn't wait} and I have not lost one receipt! This was such a great way to keep a handle on the receipts that come in. Now I actually can even upload them into Checkout 51 and iBotta because I have them on hand!
I hope this keeps up and I hope that this is insight as to how the rest of the organizing in the house will go.
Happy Organizing!
P.S. After writing receipts so much, it starts to look funny and it starts to not look correct. Anyone else notice that??
We use Mint.com to manage our budget for free. We love the program and I have been using the website before my husband and I were married..so at least 5 years. We are even able to split a purchase into two, or more, categories in the budgeting system. This is a great feature, if you actually know what you bought and where it is to be allocated.
I hated the piles of receipts piled on my desk and it was bound to happen that I would be missing an important one and just have to make it up. I really needed an easy way for my husband and I to keep the receipts together until I was able to input them.
Currently, at our front door, we have a shelf that also has hooks to hold our jackets. We always take off our jackets and shoes there, the kitchen is there and my husband uses this area as a dumping ground. If I was going to have a chance to get those receipts, this was it. I simply put a chalkboard container I had laying around for years up on the shelf and labeled it. I instructed my husband to put all receipts in the bin. No lifting a lid, no sliding a drawer, just place it in.
Even before Month 2's Challenge, I put this into action {early January, I couldn't wait} and I have not lost one receipt! This was such a great way to keep a handle on the receipts that come in. Now I actually can even upload them into Checkout 51 and iBotta because I have them on hand!
I hope this keeps up and I hope that this is insight as to how the rest of the organizing in the house will go.
Happy Organizing!
P.S. After writing receipts so much, it starts to look funny and it starts to not look correct. Anyone else notice that??
DIY Foaming Dish Soap Dispenser
I am sharing with you another brilliant idea from my husband. {Really glad I married an engineer} He brought you the "clean getaway" for your leftovers, now he is bringing you the foaming dish soap dispenser.
 I love Bath & Body Works foaming hand soap, especially lemon, in the kitchen. One day, my husband just filled an empty one up with dish soap and loved it! It is super easy, so I am sharing it with you today.
 After you add your soap, slowly add warm water until the bottle curves. You need to leave room for the foaming mechanism. If you don't, it will just overflow.

Take your empty foaming hand soap container {you really can use any foaming hand soap container, they all have the same way to make it foam} and peel off the cover. I soaked mine in warm water for about 15 minutes and peeled the label away in the water. Peeling it away in the water really helps to eliminate the need for goo gone since the gummy backside comes off with the label. {This is not a necessary step, but I don't want guests to misuse it as hand soap, plus I will add a label to make it pretty :) }
 After the label is peeled away, I filled my soap up to the first "B" on the bottle. I used Mrs. Jones Soapbox's Soapy.
One day I will add a label to it, but today was not that day.
Now your sponge is all ready to be soaped up! This may just make cleaning dishes easier....maybe.
Cleaning for the Holidays - Bathrooms and Laundry & a Giveaway
The holidays are tough. Buying the perfect present, trimming the perfect tree, decorating the house enough {but not too much} and baking the cookies without burning them. With all that stress, we add on hosting guests. Even if you are like me and do not host any major holiday events at your house, I am sure you have family that stops in or friends coming by to say hi and exchange gifts. So, we are under pressure to keep our house "guest-ready."

Cleaning Tip: After I am done scrubbing a toilet, I leave the brush in between the bowl and the seat to allow it to dry before putting it back into the holder. Wet/Dirty Brush + Dark Place = Disgusting Mold and Germs.
Soft Cleaning Scrub
 During that laundry cycle, it smelled amazing! We usually use unscented detergent when we buy it, but I do love the smell of clean, lightly scented clothes and sheets. Since the scent is due to the essential oils used in the product, I have no need to worry that it is not safe against even my daughter's sensitive skin.
a Rafflecopter giveaway
Today I am sharing with you how we are using Mrs. Jones Soapbox products in our home to keep it clean simply and naturally.
A while back at our Mom's group, one of the members shared information on how we can keep our homes safe from dangerous chemicals in our cleaning products and cosmetics. Since then the EWG {Environmental Working Group} has been a permanent resource for finding household products that I can safely use in my home without the worry that my daughter will be ingesting any toxic chemicals. I still find that even in the "safe" categories, there are toxins that need to be worried about.
I have tried over and over to make my own cleaning products and laundry detergent, but none ever seemed strong enough to really clean well. This is where Mrs. Jones Soapbox comes in.
 Mrs. Jones Soapbox prides themselves on being made with all natural, safe ingredients. They are even mixed and crafted by hand. I love that when you look at the ingredients on the label, you can not only pronounce it all, you know what each ingredient is!
And how pretty are the containers? No need to hide the dollar store spray bottles!
 Check out her comparison chart to see which of her products can replace commercial cleaners.
Toilet Bombs
I have tried and failed at making my own toilet bombs. They ended up being more of a mess than a cleaning product.
From my previous experience with Toilet Bombs, I thought there was no way that any would ever really work. Then these Toilet Bombs from Mrs. Jones Soapbox showed up in my sample kit. They really are everything I thought my homemade ones would be, just actually working.
From my previous experience with Toilet Bombs, I thought there was no way that any would ever really work. Then these Toilet Bombs from Mrs. Jones Soapbox showed up in my sample kit. They really are everything I thought my homemade ones would be, just actually working.
I simply dropped the toilet bomb in the toilet and let it fizz. When it was done, I dipped the brush into the water and used that to clean the rest of the toilet. It was cleaning the yuck off, but I was a bit skeptical that it really was "clean". After I brushed the toilet down, I actually had baby duty {she woke up early from her nap} and when I went back to the toilet 10 minutes later, at the top of the water, around the rim there was dirt. Actual dirt collected around the sides. At first I thought it was a ring that the toilet brush hadn't gotten, but when I flushed, there was no ring. I was super impressed.
Here is my video review:
Cleaning Tip: After I am done scrubbing a toilet, I leave the brush in between the bowl and the seat to allow it to dry before putting it back into the holder. Wet/Dirty Brush + Dark Place = Disgusting Mold and Germs.
Soft Cleaning Scrub
Generally, I am not a fan of scrubs. They are usually gritty and hard to clean up off of a surface. This was not the case with Mrs. Jones Soapbox scrub. Per the directions, I took a dollop and placed it on the surface to be cleaned {my sink & vanity top} and used a moist washcloth to spread it around. It was not gritty and spread very easily. The sink usually gets a lot of buildup from my husband shaving and our toothpaste. Our conventional cleaner that is a D on the EWG scale {not good, we just wanted to finish up what we had on hand} usually has a really tough time getting that buildup off. I usually have to clean it a couple times to get it all. The Mrs. Jones Scrub took it all off in one swipe like it wasn't even there. And it doesn't have any of the chemicals in it?! I was already sold.
The real test would be our tub. I took a dollop and placed it on a damp rag and started scrubbing. It didn't take a lot of pressure or scrubbing to start to see the ring from my daughter's baths start to disappear. For the last several months it has been there, even with regular cleaning {I use a magic eraser to clean the tub during showers}. I did have to use another dollop in the tub, but I think that is also because it really needed the deep cleaning. After I was done scrubbing, I just turned on the tub and used the same rag to wipe down the tub with clean water. When I squeezed the rag, I was amazed at how much dirty water came out of it. It also didn't take me as long as it does with other products. And I was able to stay in the room. Sometimes with other cleaners, I have to leave the room to take some deep breaths. In my opinion, this product performs as well as other conventional cleaners and is much safer too.

Laundry Soap & Softener
I have made my own laundry detergent before. It worked well but wasn't very effective at specific clothing types. I usually had to supplement with Oxyclean. I gave up on it.
For this particular post about guests, I used Mrs. Jones Soapbox Laundry Soap on our guest sheets that go on the air mattress bed in our basement guest room. It said that I use a heaping teaspoon per load. That's it. Again, I was very skeptical. But I am a rule follower {at least the first time} so I put just a heaping teaspoon in.
The sheets came out of the dryer soft and fluffy even without added softener {the product says it is a softener too} and still smelled great. I am not sure how to compare the cleanliness of the sheets to a conventional detergent but the Mrs. Jones Laundry Soap seemed to do the job.
The real test will be my husband's smelly running gear. {Update to come}
I had heard great things about Mrs. Jones Soapbox products and was excited to try them first hand. They really are great in the bathroom and laundry. I loved them so much, I went and purchased the other products so that I can try them everywhere! {I will review them later this week :)}
You can get them too for 10% off! Just for Managing a Home readers, you can get 10% off your order until December 31st by using the code HOME10.
You can also try Mrs. Jones Soapbox products for free! Enter the giveaway below for your chance to win the sample pack below. Three winners will be chosen!

Good luck!
Disclaimer: I have received this sample pack of (2) Toilet Bowl Bombs, (1) 5-wash Laundry Soap Sample and (1) 16 oz. container of Soft Cleaning Scrub at no charge, This review is my honest and unbiased opinion. Giveaways are supplied by Mrs. Jones Soapbox. See full disclosure statement here.
Disclaimer: I have received this sample pack of (2) Toilet Bowl Bombs, (1) 5-wash Laundry Soap Sample and (1) 16 oz. container of Soft Cleaning Scrub at no charge, This review is my honest and unbiased opinion. Giveaways are supplied by Mrs. Jones Soapbox. See full disclosure statement here.
What to do with the leftovers gone bad?
So I know you are not supposed to air your dirty laundry, but what about old leftovers? Well, I'm breaking that rule today. I'm giving you a quick, smart tip on what to do when leftovers go bad.
 I don't know about you, but in our house with just two of us {the baby doesn't eat much}, we get tired of leftovers quick.
Problem: I usually make a meal good for 4-6 people. We eat the meal, separate the leftovers into Tupperware so that we can eat them for lunches or a quick dinner when I have nothing planned. With all good intentions to eat them...
Then about a week and a half later, when going through the bottom shelf of the fridge, I find an old (sometimes moldy) at-one-time delicious meal. The only problem is - we usually have just taken out the trash.

The Solution: My brilliant husband came up with a solution to this problem when we was in college. He figured out how to make "leftover ice cubes" when he had a honeydew gone bad and was too tired to bring it all the way out to the dumpster.
Basically, when you find that Tupperware full of gross leftovers, pop the whole thing into the freezer! Then, when you take out the trash next, you go in the freezer and take out the containers and pop out the food gone bad. No smell, no mess, no bacteria - and the best part - the Tupperware goes right into the dishwasher and then it is time to run the dishwasher! (because it always is)

For the Future: I want to try and reduce my waste of food (and money) so maybe I will try to take one or two of the servings and actually freeze it so that we can eat it later. Now to organize the freezer so we can do that...
*Bonus Tip - sometimes when you are popping the food out of the container it can stick. Just run the bottom of the container under some hot water and it will pop right out!*
Give it a try and let me know what you think!
Problem: I usually make a meal good for 4-6 people. We eat the meal, separate the leftovers into Tupperware so that we can eat them for lunches or a quick dinner when I have nothing planned. With all good intentions to eat them...
Then about a week and a half later, when going through the bottom shelf of the fridge, I find an old (sometimes moldy) at-one-time delicious meal. The only problem is - we usually have just taken out the trash.
The Solution: My brilliant husband came up with a solution to this problem when we was in college. He figured out how to make "leftover ice cubes" when he had a honeydew gone bad and was too tired to bring it all the way out to the dumpster.
Basically, when you find that Tupperware full of gross leftovers, pop the whole thing into the freezer! Then, when you take out the trash next, you go in the freezer and take out the containers and pop out the food gone bad. No smell, no mess, no bacteria - and the best part - the Tupperware goes right into the dishwasher and then it is time to run the dishwasher! (because it always is)
For the Future: I want to try and reduce my waste of food (and money) so maybe I will try to take one or two of the servings and actually freeze it so that we can eat it later. Now to organize the freezer so we can do that...
*Bonus Tip - sometimes when you are popping the food out of the container it can stick. Just run the bottom of the container under some hot water and it will pop right out!*
Give it a try and let me know what you think!
Subscribe to:
Posts (Atom)